Introduction to Cake Pops
What are Cake Pops?
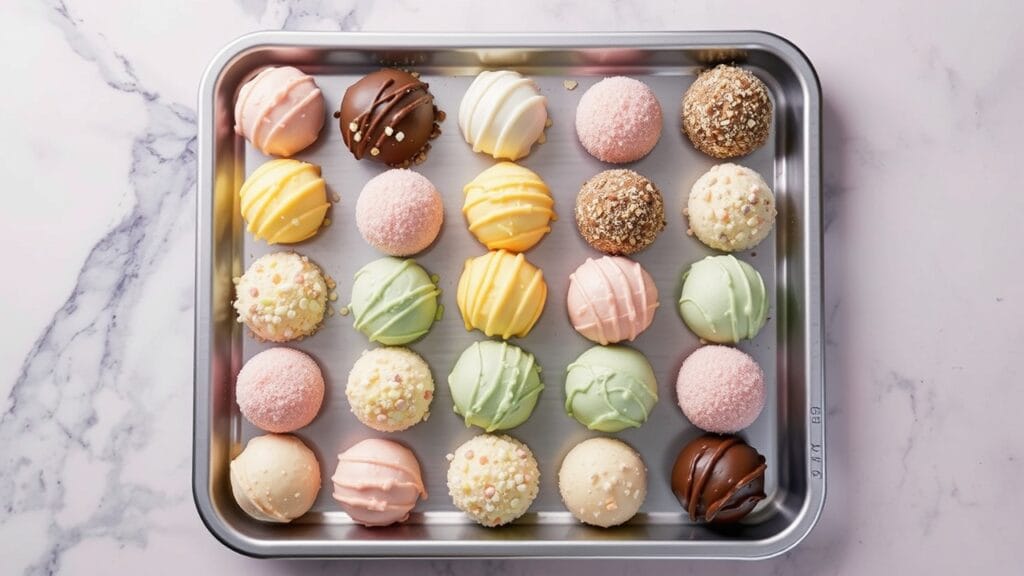
Cake pops are delightful little treats that have taken the dessert world by storm. Imagine a bite-sized piece of cake on a stick, covered in a smooth, colorful coating, and often decorated with sprinkles or other fun toppings. These tiny confections are not only delicious but also incredibly versatile and perfect for any occasion, from birthday parties to baby showers. Plus, they’re super fun to make!

History and Popularity of Cake Pops
Cake pops first gained widespread popularity in the late 2000s, thanks to the creativity of bakers who wanted to turn leftover cake into something exciting and new. The idea quickly caught on, and cake pops became a trendy dessert, featured in bakeries, cafes, and home kitchens around the world. Their cute appearance and customizable nature make them a hit with both kids and adults alike.
Ingredients Needed for Perfect Cake Pops
Essential Ingredients
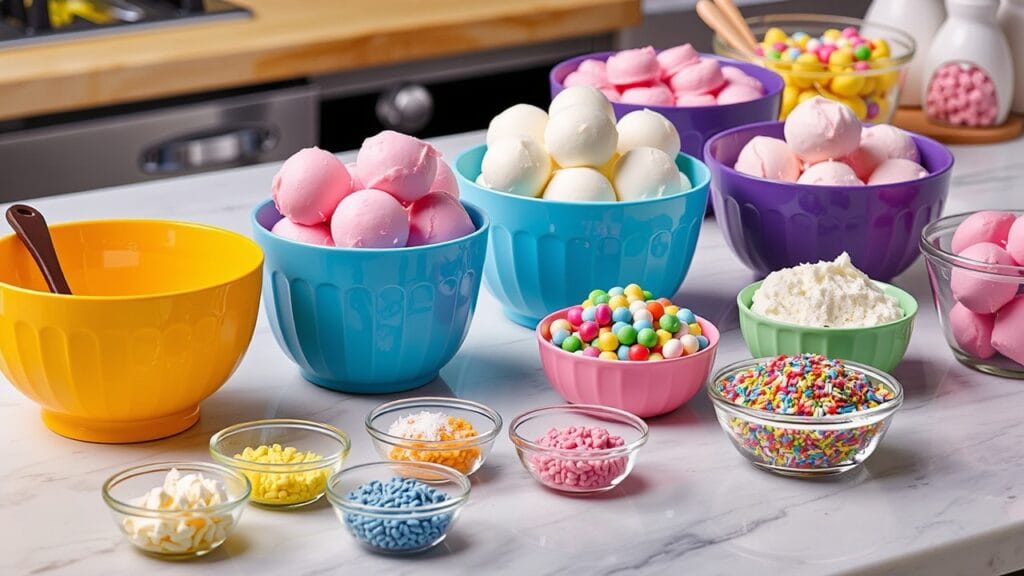
To make cake pops, you’ll need a few basic ingredients. These will form the base of your cake pops and ensure they turn out delicious every time. Here’s what you’ll need:
- Cake: You can use any flavor of cake you like, whether it’s store-bought or homemade. A boxed cake mix works perfectly fine.
- Frosting: This helps bind the cake crumbs together. Again, store-bought or homemade frosting works. Choose a flavor that complements your cake.
- Candy Melts or Chocolate: For coating the cake pops, you’ll need candy melts or chocolate. These come in various colors and flavors, allowing you to get creative with your decorations.
Optional Ingredients for Flavor and Decoration
To take your cake pops to the next level, consider adding these optional ingredients:
- Sprinkles or Edible Glitter: For a fun and festive touch.
- Flavor Extracts: A few drops of vanilla, almond, or peppermint extract can add an extra layer of flavor.
- Food Coloring: If you’re using white chocolate, you can dye it to match your party theme.
Ingredients and Quantities Table
| Ingredient | Quantity |
|---|---|
| Cake | 1 box (or homemade) |
| Frosting | 1 can (or homemade) |
| Candy Melts/Chocolate | 1-2 bags |
| Sprinkles | As needed |
| Flavor Extracts | A few drops |
| Food Coloring | As needed |
Equipment and Tools Required
Basic Tools
To make cake pops, you’ll need some essential tools that you probably already have in your kitchen:
- Mixing Bowls: For combining ingredients.
- Baking Sheet: To chill the cake balls.
- Spoons or Scoop: To form the cake balls evenly.
- Parchment Paper: To prevent sticking.
Advanced Tools for Professional Results
If you want to achieve professional-looking cake pops, here are a few extra tools that can make a big difference:
- Cake Pop Sticks: These are essential for turning your cake balls into cake pops.
- Styrofoam Block: For holding the cake pops upright as they dry.
- Candy Thermometer: To ensure your chocolate is melted to the right temperature.
- Decorating Bags and Tips: For adding detailed decorations to your cake pops.
Step-by-Step Guide to Making Cake Pops
In the next part of the article, we’ll dive into the detailed steps for making cake pops, including preparing the cake base, mixing and shaping the cake balls, and tips for achieving perfectly round cake balls.
Block Quote
“Baking is both an art and a science. It requires precision, patience, and a lot of love.” – Unknown
Stay tuned for the next part where we will cover the step-by-step guide to making perfect cake pops! 🍰✨ If you have any questions or need further assistance, feel free to ask. 😊
Step-by-Step Guide to Making Cake Pops

Preparing the Cake Base
The first step in making cake pops is to prepare the cake base. This involves baking a cake and then turning it into crumbs, which will be mixed with frosting to form the cake balls.
- Bake the Cake: Follow the instructions on the cake mix box or use your favorite homemade cake recipe. Allow the cake to cool completely before moving on to the next step. It’s essential to have a cooled cake because it will crumble more easily and mix better with the frosting.
- Crumble the Cake: Once the cake is cooled, break it into large pieces and place them in a large mixing bowl. Use your hands to crumble the cake into fine crumbs. Make sure there are no large chunks left, as this will help in creating smooth and even cake balls.
- Add Frosting: Add a small amount of frosting to the cake crumbs. Start with about a third of a can or a few spoonfuls of homemade frosting. The key is to add just enough frosting to bind the crumbs together without making the mixture too wet. You can always add more frosting if needed.
- Mix Well: Use your hands or a spoon to mix the frosting and cake crumbs together until well combined. The mixture should hold together when pressed but not be overly sticky.
Mixing and Shaping the Cake Balls
Now that your cake and frosting mixture is ready, it’s time to shape the cake balls. This step is crucial for achieving perfectly round cake pops.
- Scoop and Roll: Use a spoon or a small cookie scoop to portion out the cake mixture. Scoop out enough mixture to form a ball about the size of a ping-pong ball. Roll the mixture between your hands to form a smooth, round ball. Make sure the balls are tightly packed and have no cracks or seams.
- Chill the Cake Balls: Place the rolled cake balls on a baking sheet lined with parchment paper. Once all the cake balls are formed, place the baking sheet in the refrigerator for at least 30 minutes. Chilling the cake balls helps them firm up, making them easier to dip and decorate later.
Tips for Achieving Perfectly Round Cake Balls
Creating perfectly round cake balls can be a bit tricky, but with these tips, you’ll be a pro in no time:
- Consistent Size: Use a cookie scoop or measuring spoon to ensure all your cake balls are the same size. This consistency helps them look more uniform and professional.
- Roll with Care: When rolling the cake balls, apply gentle pressure and roll them between your palms. Avoid over-rolling, as this can cause the mixture to become too soft and sticky.
- Chill Thoroughly: Don’t skip the chilling step! This is crucial for setting the shape of the cake balls and making them easier to work with.
Block Quote
“The secret to perfectly round cake pops lies in the details. Take your time with each step, and the results will be worth it.” – Cake Pop Enthusiast
Dipping and Decorating Cake Pops
In the next part of the article, we’ll cover the fun part: dipping and decorating your cake pops. We’ll discuss choosing the right coating, techniques for smooth coating, and creative decorating ideas.
Stay tuned for the next part where we will dive into the dipping and decorating process! 🍰🎨 If you have any questions or need further assistance, feel free to ask. 😊
Dipping and Decorating Cake Pops
Choosing the Right Coating
When it comes to coating your cake pops, you have a few options. The most popular choices are candy melts and chocolate. Here’s a quick rundown of each:
- Candy Melts: These are specially designed for coating cake pops. They come in various colors and flavors, making them perfect for creating vibrant and fun designs. Candy melts also have a smooth texture that makes dipping easier.
- Chocolate: You can use white, milk, or dark chocolate. Just make sure to temper it properly to avoid issues like blooming (white streaks on the surface).
Techniques for Smooth Coating
Achieving a smooth and even coating on your cake pops can be a bit challenging, but with these techniques, you’ll get it right every time:
- Melt the Coating: Follow the package instructions for melting candy melts or chocolate. Use a microwave or double boiler, stirring frequently until smooth. If using chocolate, temper it properly by heating and cooling it to specific temperatures.
- Thin the Coating: If the melted coating is too thick, add a small amount of vegetable oil or shortening to thin it out. This makes it easier to dip the cake pops and achieve a smooth finish.
- Dip the Cake Pops: Remove the chilled cake balls from the refrigerator. Dip the end of a cake pop stick into the melted coating, then insert it into a cake ball. This helps secure the stick to the cake ball. Next, dip the entire cake pop into the melted coating, ensuring it is fully submerged. Lift the cake pop out and gently tap the stick on the edge of the bowl to remove excess coating. Rotate the cake pop to ensure an even coat.
- Let it Dry: Stick the dipped cake pop into a styrofoam block or a cake pop stand to let the coating set. If you don’t have a stand, use an inverted colander or a piece of floral foam.
Decorating Ideas and Tips
Now comes the fun part – decorating your cake pops! Here are some ideas and tips to get you started:
- Sprinkles and Edible Glitter: Add sprinkles or edible glitter while the coating is still wet. This way, they stick to the cake pops easily.
- Drizzles: Use a contrasting color of melted candy or chocolate to drizzle over the set coating. You can use a spoon or a piping bag for precise lines.
- Fondant Decorations: If you want to get fancy, use fondant to create small shapes or decorations to stick onto your cake pops.
- Edible Markers: Use edible markers to draw designs or write messages on your cake pops once the coating is completely set.
Common Problems and Solutions
Cake Balls Falling Apart
One common issue is cake balls falling apart when you try to dip them. Here’s how to prevent that:
- Chill Thoroughly: Make sure the cake balls are well-chilled before dipping. If they’re too warm, they’re more likely to fall apart.
- Add Enough Frosting: Ensure you’ve added enough frosting to bind the cake crumbs together.
- Use the Stick Method: Dip the stick in melted coating before inserting it into the cake ball. This helps secure it.
Uneven or Lumpy Coating
Uneven or lumpy coating can be frustrating. Here’s how to achieve a smooth finish:
- Thin the Coating: As mentioned earlier, thin the melted coating with a small amount of vegetable oil or shortening.
- Tap Gently: After dipping, gently tap the stick on the edge of the bowl to remove excess coating. Rotate the cake pop to help the coating distribute evenly.
Cake Pops Cracking
Cracking can occur if there’s a temperature difference between the cake ball and the coating. Here’s how to avoid it:
- Room Temperature: Allow the chilled cake balls to come to room temperature for a few minutes before dipping.
- Even Temperatures: Ensure the melted coating isn’t too hot. Allow it to cool slightly before dipping the cake pops.
Block Quote
“The key to beautifully decorated cake pops is patience. Take your time with each step, and the results will be worth it.” – Cake Pop Artist
Advanced Tips for Professional-Looking Cake Pops
In the next part of the article, we’ll cover advanced tips for professional-looking cake pops, including using molds, achieving a glossy finish, and creative decoration techniques.
Stay tuned for the final part where we will dive into advanced tips for making professional-looking cake pops! 🍭✨ If you have any questions or need further assistance, feel free to ask. 😊
Advanced Tips for Professional-Looking Cake Pops
Using Molds for Consistency
If you’re looking to achieve uniform and perfectly round cake pops, using molds can be a game-changer. Here’s how to do it:
- Choose a Mold: Invest in a good quality cake pop mold. Silicone molds are flexible and make it easy to pop out the cake balls once they’re set.
- Fill the Mold: Press your cake and frosting mixture into the mold, making sure to pack it tightly. Level off the excess mixture for an even surface.
- Chill and Unmold: Place the filled mold in the refrigerator for about 30 minutes. Once set, carefully remove the cake balls from the mold. They should be perfectly round and ready for dipping.
Achieving a Glossy Finish
A glossy finish on your cake pops can make them look professionally done. Here’s how to get that shiny, smooth coating:
- Use High-Quality Ingredients: High-quality candy melts or chocolate will give you a better finish. Cheap coatings might not melt evenly or set smoothly.
- Proper Tempering: If you’re using chocolate, temper it correctly. Tempering involves melting the chocolate to a specific temperature, cooling it slightly, then reheating. This process helps the chocolate set with a smooth, glossy finish.
- Avoid Humidity: Moisture can cause your coating to look dull or streaky. Work in a cool, dry environment for the best results.
Creative Decoration Techniques
Take your cake pops to the next level with these creative decoration techniques:
- Layered Colors: Dip your cake pops in one color, let them set, and then dip them partially in another color for a layered effect.
- Marbling: Swirl different colors of melted coating together and dip the cake pops to create a marbled look.
- Edible Paints and Luster Dust: Use edible paints or luster dust to add metallic accents or intricate designs to your cake pops.
Storing and Serving Cake Pops
Proper Storage Methods
To keep your cake pops fresh and delicious, follow these storage tips:
- Room Temperature: If you plan to eat the cake pops within a day or two, you can store them at room temperature in an airtight container.
- Refrigeration: For longer storage, place the cake pops in an airtight container and refrigerate them. They can last up to a week in the fridge.
- Freezing: Cake pops can be frozen for up to a month. Wrap them individually in plastic wrap and place them in a freezer-safe container. Thaw them in the refrigerator before serving.
Presentation Ideas
Make your cake pops look as good as they taste with these presentation ideas:
- Styrofoam Display: Insert the sticks into a decorated styrofoam block for an easy and elegant display.
- Mini Vases or Mason Jars: Fill small vases or jars with candy or decorative stones, and place the cake pops in them for a fun and colorful presentation.
- Gift Packaging: Wrap individual cake pops in cellophane bags tied with a ribbon for a cute and thoughtful gift.
Block Quote
“Presentation is key. Even the simplest cake pop can look spectacular with the right display.” – Cake Pop Designer
Conclusion
Recap of Key Points

Making cake pops round and smooth is all about following the right steps and techniques. From preparing the cake base and mixing and shaping the cake balls, to dipping and decorating them, each step is crucial for achieving perfect results. Remember to chill your cake balls thoroughly, choose the right coating, and be patient with the decorating process.
Encouragement to Experiment and Have Fun (H3)
The best part about making cake pops is that they’re incredibly versatile and fun to make. Don’t be afraid to experiment with different flavors, colors, and decorations. Whether you’re making them for a special occasion or just for fun, cake pops are a delightful treat that everyone will love.

